TL;DR: Define your services and availability first, then choose between embedding a third-party scheduler or generating your own custom system with AI (which takes minutes with platforms like Bubble). Connect your calendars and payment processing, design a mobile-friendly booking page with minimal intake fields, deploy to web and mobile, then test the complete flow before launching to customers.
Phone tag with customers wastes time you don't have. Every missed call is a potential booking lost to a competitor who makes scheduling easier. In 2026, customers expect to book appointments instantly from their phones — at midnight if that's when they're thinking about your service.
An online booking system solves this — a peer-reviewed study found online scheduling cut unused appointments by over half. It shows your real-time availability, lets customers choose their preferred time slot, and handles the confirmation and reminder process automatically. And in 2026, you don't need to be a developer to build one — AI-powered platforms let anyone create custom booking systems in minutes. Whether you're a yoga instructor, consultant, or salon owner, these steps will help you capture bookings around the clock.
Step 1: Define services, availability, and requirements
An online booking system is software that displays your available time slots and lets customers schedule appointments without phone calls or emails.
Before you touch any technology, you need to map what you're actually offering and when you can deliver it. Start by listing every service you provide with its duration and price. If you're a massage therapist, you might offer 30-minute, 60-minute, and 90-minute sessions at different price points. If you're a consultant, you might have discovery calls, strategy sessions, and implementation meetings.
Write these down with exact durations because they determine how your calendar gets divided into bookable slots.
Next, map your working hours and breaks. Block out when you're available for appointments each day of the week, including buffer time between bookings. Many service providers need 10–15 minutes between appointments to reset, clean up, or simply take a breath. You'll also want to note holidays, vacations, and any recurring time blocks when you're unavailable.
Finally, identify what information you need from customers before they arrive. This might include:
- Contact details like name, email, and phone number
- Service preferences or specific requests
- Health history for medical appointments
- Project goals for consultations
Keep this list short — 81% of people have abandoned a form after beginning to fill it out, so every extra field reduces the chance someone completes the booking.
Here are some examples:
| Duration | Required Customer Data | |
|---|---|---|
| Massage Therapy | 30, 60, or 90 minutes | Name, email, phone, injury history, pressure preference |
| Consulting Session | 30 or 60 minutes | Name, email, phone, project goals, company size |
| Yoga Class | 45 or 60 minutes | Name, email, phone, experience level |
| Hair Salon | 30–120 minutes | Name, email, phone, service type, stylist preference |
| Personal Training | 30, 45, or 60 minutes | Name, email, phone, fitness goals, health conditions |
| Tutoring Session | 45 or 60 minutes | Name, email, phone, subject area, grade level |
| Photography Session | 60, 90, or 120 minutes | Name, email, phone, session type, location preference |
| Legal Consultation | 30 or 60 minutes | Name, email, phone, case type, urgency level |
| Pet Grooming | 30–90 minutes | Name, email, phone, pet type, service needed |
Step 2: Pick your approach — embed vs build
You have three main options for adding booking functionality to your business. The real difference isn't cost — you'll pay platform or processing fees regardless — but how much control you need over the customer experience and what happens as your business grows.
Hosted booking link and QR sharing
The simplest approach is using a third-party scheduling platform that gives you a direct link to share. Tools like Calendly, Acuity Scheduling, or Square Appointments create a booking page you can share through social media, email signatures, or printed materials.
You can even generate QR codes that customers scan to book instantly. This works well when you're testing demand for a new service or just need something running quickly.
The tradeoff is customization. You're limited to the features and branding options the platform provides. If you want to add custom intake questions, route bookings based on specific business logic, or integrate with your existing systems in unique ways, you'll hit the platform's limitations quickly.
Embed in your website — inline or pop-up
Embedding puts booking functionality directly on your website using code snippets from scheduling platforms. You can display an inline calendar that sits in the body of your webpage, or add a pop-up widget that opens when visitors click a "Book Now" button.
This keeps customers on your site during the entire booking process, which improves conversion rates and maintains your brand experience. Most scheduling platforms provide embed codes you can copy and paste into your website builder.
But you're still working within the constraints of the third-party platform — their interface, their data structure, their feature set.
Build a custom system with AI and visual editing
For complete control over the booking experience, you can build exactly what you need on platforms like Bubble. Chat with AI to generate a working booking system in minutes, then continue using the AI Agent to add features or switch to visual editing when you want precise control over any detail.
This approach gives you full ownership of customer data, complete customization of the booking flow, and everything you need built-in: database management, hosting, security, and automatic scaling. Add features like routing customers to specific staff members or locations through visual workflows or by prompting the AI Agent. You'll pay platform fees to Bubble ($59+/month for live apps) and transaction fees to payment processors like Stripe (2.9% + 30¢) or PayPal (2.99% + fixed fee) when processing payments — similar economics to dedicated booking platforms, but with complete flexibility to build exactly what your business needs.
Step 3: Connect calendars, payments, and policies
Once you've chosen your approach, you need to connect the systems that make booking actually work. These integrations prevent scheduling conflicts, reduce no-shows, and protect your business from last-minute cancellations.
Sync calendars and add buffers
Enable two-way synchronization between your booking system and the calendars you already use — Google Calendar, Outlook, or Apple Calendar. Two-way sync means that appointments booked through your system appear on your calendar, and time blocks on your calendar show as unavailable in your booking system. In Bubble, you can do this with plugins or the API Connector.
This prevents double bookings when you manually schedule appointments or block personal time. Most booking platforms offer built-in calendar integrations that connect in just a few clicks. You'll authorize the connection once, and appointments sync automatically from that point forward.
Buffer times are short breaks you schedule between appointments. Add buffer times of at least five to 10 minutes between appointments. Buffer times give you time to reset between sessions, prepare materials, or simply take a breath.
Collect deposits and set refunds
Integrate payment processing to collect deposits when customers book. This significantly reduces no-shows — when someone has paid even a partial deposit, they're far more likely to show up or give you advance notice if they need to cancel.
Connect your booking system to payment processors — supported options vary by platform. Acuity Scheduling integrates with Stripe, Square, and PayPal. Google Calendar (Workspace) connects with Stripe. Square Appointments naturally integrates with Square payments. Bubble has a Stripe plugin or can connect with any processor via the API Connector. Check your chosen booking platform's documentation for supported payment processor options. You can require full prepayment, collect 50% deposits, or allow customers to pay after service depending on your business model.
Create clear cancellation and refund policies before you launch:
- Cancellation window refers to how many hours notice you require before appointments (commonly set at 24–48 hours, though businesses can configure their own policies)
- Refund percentage indicates what portion of the deposit is refundable
- Late cancellation fees determine whether you charge fees for cancellations within your window
- No-show policy defines what happens if someone doesn't show up at all
Display these policies prominently during the booking process so customers know exactly what they're agreeing to.
Automate reminders and route to staff or locations
Set up automated email and SMS reminders to dramatically reduce no-shows. A simple reminder 24 hours before the appointment can prevent missed appointments that cost your business time and money.
Most booking systems let you schedule multiple reminders:
- Immediate confirmation after booking
- Reminder 48 hours before the appointment
- Final reminder two hours before the appointment
Customize the message for each reminder to include relevant details like location, what to bring, or how to prepare.
If you have multiple staff members or service locations, add routing rules that automatically assign bookings to the right person or place. You can route based on service type (sports massage goes to one therapist, deep tissue to another), availability (whoever has an open slot), or customer preference (let them choose their provider from available options).
Step 4: Design your booking page and intake
Your booking page is where customers choose their appointment time and provide necessary information. The design needs to work perfectly on mobile devices since many people book while browsing on their phones. (With Bubble, you could even build your booking system a native mobile app.)
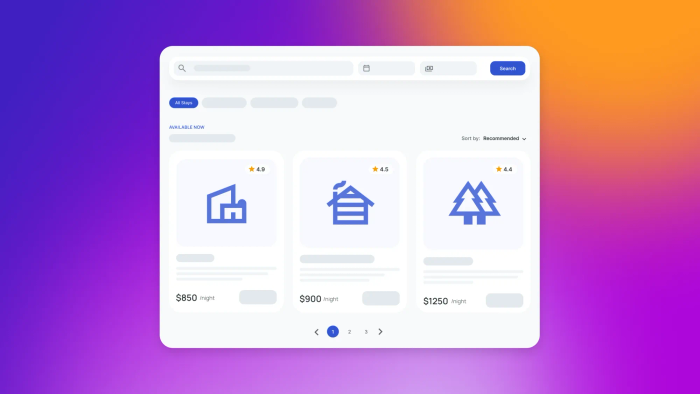
Create a clean, scannable interface that shows available time slots clearly. Use a calendar view that displays a full week at a glance, with morning, afternoon, and evening slots clearly separated. Make sure tap targets (buttons and time slots) are large enough to select easily on a smartphone screen.
Only collect essential information in your intake form. Reducing form fields from 7 to 3 can increase conversions by 20–35%, so every additional field you add increases the chance someone abandons the booking halfway through.
A massage therapist might ask about injuries or sensitivities, but they don't need a customer's full medical history upfront. A consultant might ask about project goals, but they can discuss details during the actual call.
If you manage multiple staff members or service types, add filters at the top of your booking page. Let customers select their preferred service first, then show only the relevant providers and time slots. This prevents overwhelming them with choices and helps them find exactly what they need quickly.
Test your booking page on different devices and screen sizes. The form should work smoothly on the latest iPhone, older Android phones, tablets, and desktop computers. Pay special attention to the checkout flow on mobile — make sure payment fields are easy to tap and that the keyboard doesn't cover important buttons.
Step 5: Add bookings to your website and mobile app
Your booking system needs to live wherever customers discover your business. That means integrating it into your website, social profiles, and potentially a dedicated mobile app.
For website integration, you have several options. Embed an inline booking calendar directly on your services page so visitors can schedule without clicking away. Add a pop-up booking widget that appears in a corner of every page, letting customers book from anywhere on your site. Or use a simple "Book Now" button in your header that opens the booking calendar in a modal window. With Bubble, you can build your entire website on the same platform as your booking system — no need to pay separately for website hosting or manage integrations between different services.
Share your booking link in your email signature so every message you send includes an easy way to schedule with you. Add it to your Instagram bio, Facebook page info, and LinkedIn profile. Create QR codes for printed materials like business cards or storefront signage that people can scan to book instantly.
If you offer ongoing services that benefit from push notifications, you can generate native iOS and Android apps alongside your web app on Bubble. Apps let you send customers timely reminders, special offers, or last-minute availability directly to their home screens.
Bubble lets you generate web and native iOS/Android apps from the same editor, sharing the same database, workflows, and backend. You maintain a single booking system that powers all your touchpoints — update once, deploy everywhere. Mobile apps have separate build submission and version limits depending on your plan tier (five to 20 builds/month, three to eight live versions).
If you're building your booking system on Bubble, design consistency is automatic — your booking pages use the same styling, fonts, and visual elements as the rest of your application. If you're embedding a third-party scheduler, make sure it matches your brand colors and fonts so it doesn't feel like a jarring plugin.
Step 6: Test, launch, and track performance
Before going live, test every part of your booking system as different user types and scenarios. Book appointments as a new customer, as a returning client, and during edge cases like the last slot of the day or when only one appointment remains.
Try to double-book yourself by scheduling overlapping appointments in different calendars. Verify that your calendar sync is working in both directions — appointments booked through your system should appear in your personal calendar, and personal time blocks should show as unavailable in your booking system.
Test the payment flow end-to-end to ensure deposits are processed correctly and customers receive proper receipts. Check that automated reminders send at the correct times and include all necessary information. Book a test appointment and verify you receive the immediate confirmation, 48-hour reminder, and two-hour reminder as expected.
Make sure cancellation links work and that the system properly handles refunds according to your policies. Test what happens when someone tries to book during a buffer period or outside your working hours — the system should prevent these bookings automatically.
Launch your booking system with clear communication to existing customers. Send an email explaining the new system, emphasizing how it makes scheduling easier for them. Post about it on social media and update your website to prominently feature the "Book Now" options.
After launch, monitor key metrics to understand how your booking system performs:
- Booking conversion rate measures how many visitors actually complete a booking
- No-show rate indicates whether reminders are working effectively
- Average time to book tracks how long it takes from initial visit to completed booking
- Peak booking times show when customers prefer to schedule appointments
Most scheduling platforms include basic analytics, or you can connect to Google Analytics for deeper insights.
Collect feedback from customers about their booking experience. Send a brief follow-up survey asking if the process was easy and what could be improved. Pay attention to where customers drop off in the booking flow — if many people abandon during payment, you might need to add more payment options or clarify your pricing.
Iterate on your system based on real usage data. If you notice many bookings happen outside business hours, your 24/7 availability is clearly valuable. If you get frequent questions about a particular service, add clarifying text to your booking page. If no-shows remain high despite reminders, consider requiring larger deposits.
Launch with speed and keep control
Setting up a booking system in 2026 is easier than ever, but the approach you choose determines whether you'll outgrow it in six months or scale it for years. The key benefits remain consistent across all approaches — save time on scheduling, reduce no-shows with automation, and provide the professional, convenient experience customers expect.
The difference lies in what happens after you get started. Embedded solutions get you running quickly but trap you with limited customization and per-transaction fees. With Bubble AI, custom systems take the same amount of time to generate — minutes, not weeks — but you maintain complete ownership of the customer experience, data, and economics. You get AI speed and full control, not one or the other.
If you want full control without coding, Bubble lets you vibe code without the code. Generate a booking app with AI, then chat with the AI Agent to add features or switch seamlessly to visual editing when you want precise control over any detail. You can see exactly how appointments flow through your system in visual workflows, adjust reminder timing based on what works, and add features like staff routing or multi-location support by prompting the AI Agent or editing directly. Understanding what you build means you can evolve it yourself without hiring developers. Start building for free.
Whatever approach you choose, focus on making the booking process as simple as possible for customers. Every extra click or form field costs you bookings. Test on mobile devices, measure what matters, and continuously refine based on how real customers actually use your system.
Frequently asked questions
Can I use Google Calendar's appointment schedules as my booking system?
Google Calendar's appointment schedule feature works for basic booking needs. Personal Google Account users can create one booking page but lack payment processing and advanced features. However, Google Workspace subscribers can create unlimited booking pages, collect payments through Stripe, send automatic email reminders, verify booker emails, and check multiple calendars for availability. Workspace still may lack some advanced customization options compared to dedicated booking platforms like detailed intake forms and sophisticated multi-step reminder sequences.
How do I prevent double bookings when I use multiple calendars?
Enable two-way calendar synchronization between your booking system and all calendars you use for personal and business appointments. Add buffer times of at least five to 10 minutes between appointments to give yourself reset time between sessions and prevent back-to-back appointments from overlapping.
Do I need my own website to accept online bookings?
No, you can share a direct booking link through social media profiles, email signatures, or messaging apps without having a full website. However, having your own branded booking site typically improves conversion rates because customers feel more confident booking through your branded presence. On Bubble, you can generate a simple booking website with AI in minutes — no need to choose between a link and a full site.
What's the best way to handle booking deposits and refund requests?
Collect deposits through integrated payment processing at the time of booking — 50% is standard for many service businesses. Create clear cancellation policies specifying refund timeframes: full refunds for cancellations 48+ hours in advance, 50% for 24–48 hours, and no refund for same-day cancellations or no-shows.
Can I automatically assign bookings to different staff members or locations?
Yes, most modern booking systems offer routing rules that distribute appointments based on staff availability, service type, location, or customer responses to intake questions. You can use round-robin distribution to balance workload evenly across team members or let customers choose their preferred provider from available options.
What information should I collect from customers when they book?
Collect only the minimum information needed to deliver good service — typically name, email, phone number, and service preference. Every additional form field increases booking abandonment rates, so avoid lengthy questionnaires unless the information is absolutely necessary before the appointment rather than during it.
How can I reduce no-shows for appointments I've already scheduled?
Send automated reminders via both email and SMS at 48 hours and two hours before appointments — this timing gives customers advance notice plus a last-minute prompt. Require deposits at booking time rather than allowing free reservations, which creates financial commitment that significantly reduces no-show rates.
Build for as long as you want on the Free plan. Only upgrade when you're ready to launch.
Join Bubble