TL;DR: You can build and publish a native iPhone app without coding by generating screens with AI, refining them through visual editing, testing on real devices, and submitting to the App Store through an automated build-and-upload process.
Most people who want to build an iPhone app already know what they want to make. The sticking point is usually feasibility: can someone without a technical background or a big budget actually get an app into the App Store?
The traditional answer is “learn Swift,” which sends most people down a months-long detour that has nothing to do with their actual goal. The newer answer is “use an AI coding tool,” which works until it doesn’t — and when it breaks, you’re staring at generated code you can’t read, rewriting the same prompt hoping for different output.
This guide covers the full journey from idea to live App Store listing: how to choose the right development path for your situation, what it actually costs, and how to build, test, and submit a native iPhone app step by step.
How to choose your iPhone app development path
Your iPhone app development path comes down to one question: do you want to write code, or do you want to build visually? If you’re learning Swift professionally or need platform-exclusive capabilities, traditional coding makes sense. If you want to launch without writing code (and understand everything you build), visual AI development is a faster path to the App Store.
| Tools | Coding required | Timeline | Best for | |
|---|---|---|---|---|
| Traditional Swift | Xcode, Swift | Yes | Months to years | Professional iOS developers |
| Cross-platform frameworks | React Native, Flutter | Yes | Weeks to months | Teams wanting one codebase across platforms |
| Visual AI development | Bubble | No | Days to weeks | Founders and teams who want to launch quickly without coding |
Traditional coding with Swift
Building with Swift and Xcode gives you complete control over your app. This is the path professional iOS developers take. The learning curve is steep, and the time required varies widely based on prior programming experience and app complexity.
When errors occur, you debug the code yourself. When you want to add a feature, you write it from scratch. This path makes sense if you’re planning to become a full-time iOS developer or if your app requires capabilities that only native Swift development can provide.
Cross-platform frameworks
Frameworks like React Native or Flutter let you write code once and deploy to both iOS and Android. This saves time compared to writing separate codebases for each platform. You still need to know how to code, manage development environments, and handle complex deployment processes.
The trade-off: When something breaks, you’re reading error messages and debugging logic you may not fully understand.
Visual AI development
Bubble lets you build native iOS and Android apps visually, without writing code, from the same platform that handles your database, workflows, hosting, security, and deployment. Native mobile is in public beta. You describe your idea to Bubble AI, and it generates native mobile frontend screens with dynamic expressions in minutes. From there, you use the Bubble AI Agent (beta) to add features and iterate through conversation, or switch to the visual editor to customize your design, database, and logic directly.
You get the speed of AI generation with the freedom to take visual control whenever you need it. This path works well for founders and teams who want to launch quickly without learning to code, and who want to understand and maintain what they’ve built.
What it costs to build and publish an iPhone app
The minimum cost to publish an iPhone app is $99 per year for the Apple Developer Program, required for every App Store submission. Development costs depend on your path: traditional development can run $50,000–$120,000 for a medium-complexity app, with averages across all custom projects running higher, while Bubble lets you start building for free and offers plans that scale with your app’s usage.
Apple Developer Program
The Apple Developer Program gives you access to TestFlight for beta testing, App Store Connect for managing your listing, and the ability to publish your app to users worldwide. The fee is the same whether you publish one app or 20.
Development tools and hosting
If you choose traditional development, the tools themselves are free — Xcode, for example, downloads at no cost. But you’re responsible for setting up and paying for your own database, server hosting, and backend infrastructure, and managing them requires technical knowledge or additional hires.
If you build with Bubble, your development environment, database, and hosting are all included in one platform. You can start building for free, then upgrade to a paid plan when you’re ready to publish, and it scales automatically with your app’s usage.
Step 1: Set up your system and Apple accounts for iPhone development
Start by creating your Apple ID at appleid.apple.com if you don’t have one. Then visit developer.apple.com and enroll in the Apple Developer Program. Apple requires identity verification and payment during enrollment, and processing times can vary, so enroll before you need to submit your app.
If you’re building with Bubble, you don’t need a Mac. You can build your entire iPhone app in any browser on any operating system, then Bubble handles packaging and upload to App Store Connect automatically.
If you’re taking the traditional Swift route and you’re on Windows, you can rent a cloud Mac service such as MacinCloud, with managed plans starting around $26 per month and pay-as-you-go options around $1 per hour, depending on configuration. Remote access can feel slower than a physical Mac, but it works for the build and submission steps that require Xcode.
Install development tools and confirm device access
Connect your iPhone to your Mac using a USB cable. Your device should appear in your development environment’s device selector. If your iPhone doesn’t show up, unlock it and tap “Trust This Computer” when prompted.
If you’re building with Bubble, use BubbleGo, a preview app that lets you test your app on your iPhone. On iOS, install TestFlight from the App Store, then use Bubble’s TestFlight link to install BubbleGo. On Android, install BubbleGo from the Google Play Store. Log in with your Bubble account, select your mobile app, and preview it on your device. Make a change in the editor, refresh in BubbleGo, and see the update.
Testing on a real iPhone catches issues that web preview misses. Bubble’s web preview does not fully support mobile-only functionality: push notifications cannot be sent there, camera workflows may not work properly, and permission-related workflows can behave differently from a real device. Touch interactions also feel different on actual hardware, and performance varies by device model.
Learn Apple’s design expectations early
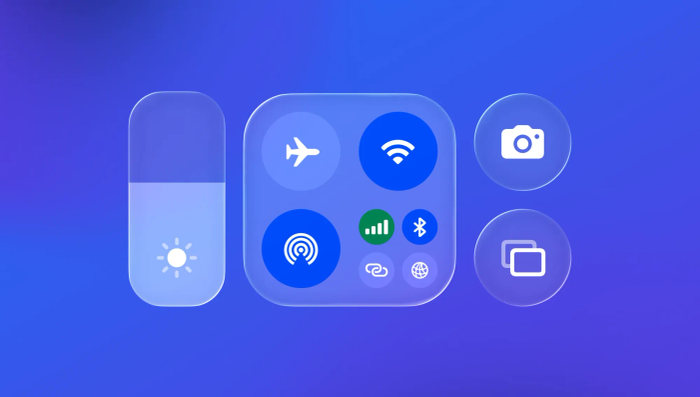
Apple’s Human Interface Guidelines define what iPhone apps should look and feel like. These aren’t strict rules, but following these patterns makes your app feel native to iOS users. The guidelines cover navigation styles, touch target sizes, gesture patterns, and accessibility requirements.
iPhone users expect specific navigation patterns:
- Tab bars at the bottom for main sections, usually three to five primary areas that users can switch between with a single tap.
- Navigation stacks for drilling into details, like Settings screens or product pages where users tap into a category and back out.
- Sheets for focused tasks such as forms, confirmations, and filters that appear over the current screen and dismiss with a downward swipe.
- Familiar gestures including swipe back, pull to refresh, and long-press for options, which users already know from other apps.
iPhone users already know these patterns from every other app on their phone. Building with them means your app feels familiar from the first tap.
Step 2: Generate your iPhone app foundation with AI
Bubble AI builds your initial native mobile frontend in minutes. Describe what you want and Bubble AI generates mobile screens with dynamic expressions. Everything it creates is visual and editable from the start.
Describe your app idea in plain language. Be specific about what users will do: “I want to build a recipe app where users can browse recipes, filter by dietary restrictions, save favorites, and create shopping lists.” Bubble AI analyzes your description and suggests features and screens before generating anything.
Bubble AI can also generate native mobile screens using iOS-style patterns like tab bars, stack navigation, and bottom sheets. From there, the Bubble AI Agent helps you connect workflows and refine your app through conversation. Everything appears in visual format so you can see what was created and understand how it works.
Create your app concept and prompt for blueprints
The best prompts describe what users need to do, not how the screen should be built. “I need a login screen with email and password fields” tells Bubble what to draw. “Users should be able to create accounts and log in to save their data” tells it what to solve. The second approach gets you better results.
Be specific about your users and the problem they’re trying to fix. Something like “I’m building a task manager for freelancers who juggle multiple client projects. They need to create projects, add tasks with deadlines, track time spent, and generate client invoices” gives Bubble AI enough context to generate features that actually match your use case, not just a generic template.
Before anything gets built, Bubble AI presents a blueprint of suggested features and screens. Take a minute to review it. It might surface something useful you hadn’t thought of, or miss something you care about. You can adjust it through chat or by editing the suggestions directly before generation starts.
Switch between AI speed and visual precision
The Bubble AI Agent helps you add features and iterate through conversational prompts. For native mobile apps, the Agent acts as your expert guide. Ask it “how do I add a settings screen where users can change their profile photo and notification preferences” and it walks you through the exact steps, explaining which elements to add, how to connect database fields, and what workflows to create.
When you’re ready to bring your vision to life, switch to visual editing. Click any element, workflow, or database field to edit it directly. Change button colors, adjust spacing, modify data structures, or rebuild entire workflows through visual interfaces you control. This flexibility means you never get stuck.
The Agent explains each step clearly as you work. When you build a workflow, it describes every action and condition you need. When you modify your database, it specifies the exact fields to add or change. This transparency means you always understand what’s happening in your app. (Note: Full native mobile editor editing through the Agent is coming soon; today, the Agent can guide you step-by-step while you apply changes in the visual editor.)
Step 3: Design native iPhone interfaces with visual tools
Native iOS design means your app uses the interface elements and patterns that iPhone users already recognize. When your app follows these conventions, users understand how to navigate it without any instruction.
Bubble generates iOS apps with native components built on React Native — the same cross-platform framework used by Amazon, Coinbase, Discord, and Facebook. It’s a real native app with access to device features such as camera and photo library, push notifications, location services, biometric authentication, native gestures, and offline read-only support.
Start with the screens Bubble AI generated and refine your mobile app design using visual tools. Add elements by dragging them onto your canvas. Adjust spacing, colors, and styles using the property editor. Create navigation flows by linking screens together.
Choose the right components for each screen
Different screens need different types of containers and layouts. Understanding when to use each one helps you build interfaces that feel natural.
Tab bars work best for main app navigation when you have three to five primary sections. Users can switch between these sections with a single tap from anywhere in the app. A fitness app might have tabs for Today, Workouts, Progress, and Profile. A shopping app might use Browse, Cart, Orders, and Account.
Stack navigation handles hierarchical content where users drill into details and navigate back. Settings screens work this way: You tap into a category, then into a specific setting, then back out. Product catalogs also use stacks: browse a category, tap a product, view details, return to browsing.
Sheets present focused tasks without leaving the current screen. Use sheets for forms (creating a new item), confirmations (are you sure?), and filters (narrow search results). Sheets appear over the current screen and dismiss with a downward swipe or cancel button.
Lists display collections of similar items: messages in an inbox, products in a category, comments on a post. Bubble provides native mobile list components such as vertical lists, section lists, list items, section headers, and swipe actions for familiar mobile list interactions.
Secure user data with visual privacy rules
Privacy rules are a foundational layer of mobile app security, controlling who can see and modify data in your app. You can see these rules in visual format and adjust them to match your app’s requirements.
In a fitness tracking app, each user should only see their own workout data. The privacy rule for workout data might say “This workout is viewable when the workout’s creator is the current user.” You create this rule by selecting fields in dropdown menus, no code required.
The security dashboard scans your app for potential data leaks before you publish. It identifies database fields without proper privacy rules, API calls that might expose sensitive information, and other security issues. Each issue includes a “Fix in editor” button that takes you directly to where you need to make changes.
Step 4: Test your app on real devices and gather feedback
Testing catches problems before your users find them. Use Bubble’s mobile web preview device selector to emulate widely used device sizes and confirm your interface adapts across screens.
Preview tools are great for quick testing during development, but they can’t replicate real device performance. Move to real iPhone testing as soon as possible. Real devices reveal performance issues previews hide: stuttering animations, slow screen transitions, features that drain the battery.
With Bubble, use BubbleGo to test on your device without deploying to the App Store. Make a change, then refresh on your phone. This immediate feedback loop dramatically speeds up development.
Progress from simulator to real device testing
Preview testing catches layout issues, broken workflows, and visual bugs quickly. Test basic functionality here first:
- Verify that users can create an account, confirming the signup flow stores data correctly and triggers any welcome workflows.
- Verify that navigation works across tab bars, stacks, and sheets so users can move through the app without dead ends.
- Verify that forms save data to the right database fields and that validation messages appear when required inputs are missing.
Preview tools also make it easy to test different iPhone sizes. Verify that your interface adapts properly from smaller screens to larger Pro Max displays.
Real device testing reveals performance and usability issues. Notice how quickly screens load, whether animations feel smooth, and how comfortable the app is to use one-handed. Pay attention to touch interactions: are buttons easy to tap, do gestures work as expected, does the keyboard appear when it should.
Test on at least two devices if possible: an older model and a newer model. Older devices expose performance issues sooner. Newer devices show how your app performs with the latest iOS features and screen sizes.
Collect feedback through TestFlight beta testing
TestFlight is Apple’s platform for distributing beta versions of your app to real users before you publish. You can invite up to 10,000 testers using email addresses or a public link. Beta testers download your app through the TestFlight app and submit feedback directly to you.
Set up TestFlight through App Store Connect at appstoreconnect.apple.com. Create your app listing, then upload a beta build. You can organize testers into groups: internal testers (your team) and external testers (users, friends, potential customers). Internal testing helps you catch obvious issues before opening to external testers.
Good usability testing depends on specific questions. A vague question like “what do you think?” rarely surfaces anything useful. Ask something specific instead: “were you able to create an account and log your first workout in under two minutes?” Specific questions generate actionable feedback. Watch for patterns — if multiple testers struggle with the same feature, that’s a clear signal to improve it before launch.
Step 5: Submit to the App Store with confidence
Getting your app into the App Store takes more preparation than most people expect — but none of it is technically difficult. You’re filling out a listing, preparing visual assets, and packaging a build. The review process handles the rest.
Start in App Store Connect by creating a new app record. You’ll enter your app name, primary language, bundle ID, and SKU. These details anchor your listing and can’t easily be changed later, so take a minute to get them right.
Your description and screenshots are what sell the download. Most users scroll the screenshots first and only read a sentence or two of the description, so lead with what your app actually does and show it in action. A fitness app should show workout logging. A shopping app should show browsing and checkout.
Prepare App Store assets and metadata
Your app icon appears throughout iOS: in the App Store, on user home screens, in Settings, and in search results. Create a simple, recognizable icon that works at small sizes. Avoid detailed imagery or text that becomes illegible when scaled down. Prepare a 1024×1024 App Store icon and follow Apple’s current icon asset requirements for the app binary and App Store listing.
Keywords affect how users discover your app through App Store search. Research what terms potential users might search for:
- A meditation app might target keywords such as mindfulness, sleep, anxiety, and breathing exercises to reach users who are searching for emotional and wellness solutions.
- A recipe app might target cooking, meal planning, grocery lists, and dietary restrictions to attract home cooks looking for structure and inspiration.
- A budget app might target expense tracking, savings goals, bill reminders, and financial planning to connect with people actively trying to take control of their money.
Apple’s keyword field is commonly described as limited to 100 characters per locale, so verify the current App Store Connect guidance and avoid wasting keyword space on redundant terms that already appear in your app name or description.
Privacy labels explain what data your app collects and how you use it. Apple requires this information for every app. Even if your app doesn’t collect any data, you must explicitly state that. Be thorough and accurate, because this information appears on your product page and should match your app’s actual data collection and use.
Package and submit your app automatically
Traditional app submission requires manually creating builds, managing signing certificates, and navigating complex deployment settings. Bubble handles iOS build packaging and uploads the build to App Store Connect for you. You’ll still complete App Store metadata, select the build, answer required compliance questions, and submit it for Apple’s review.
Once your build uploads, return to App Store Connect to add final details. Select your uploaded build, add required information like export compliance, and submit for review. Apple’s review team manually tests your app against App Store guidelines. Review times vary, but most submissions get a response within a few days.
Apple rejected over 2 million app submissions in 2025, with common reasons including crashes, broken features, misleading descriptions, and privacy issues. Review the feedback, make the required changes, upload a new build, and resubmit.
Step 6: Launch and grow your iPhone app
Getting approved is the milestone. Getting users and keeping them is the work that starts after. That means choosing a business model before launch, not after, and thinking about onboarding from day one.
| Best for | User expectations | Revenue timeline | |
|---|---|---|---|
| Free with ads | High-volume apps, games, social apps | Quick downloads, frequent use | Requires significant active usage for meaningful revenue |
| Paid upfront | Utility apps, professional tools | Clear value before purchase | Immediate revenue but harder to get downloads |
| Freemium | Apps with premium features | Compelling free experience first | Revenue grows as free users convert to paid |
| Subscription | Ongoing value apps | Continuous improvements and updates | Recurring revenue from active subscribers |
Free apps with ads work when you expect high download volume and frequent user engagement. Each user generates small revenue from ad impressions, so meaningful income depends on ad format, geography, retention, and CPMs. Paid-upfront pricing can work when users understand the value before purchase, but validate pricing against category norms and user willingness to pay.
Freemium apps offer core features for free with optional premium upgrades. This lowers the barrier to trying your app while creating a clear path to revenue. Users get comfortable with the free version, then upgrade when they need more. Subscription apps work best when you provide ongoing value — new content, regular updates, or features users rely on daily. Choose price points based on your category, user research, and App Store economics.
Plan your launch and onboarding experience
Most users decide within the first minute whether an app is worth keeping. Onboarding screens give you that minute: Use them to show the one thing your app does better than anything else, then get the user doing it. Three or four screens is plenty. More than that and you’re delaying the moment they actually experience the value.
A task management app might show three screens: “Create tasks with one tap,” “Set reminders to stay on track,” and “See your completed work.” Each screen demonstrates a core feature with a visual example. After onboarding, guide users toward a quick first success, such as creating their first task, to help them experience the app’s value quickly and increase the likelihood they will return.
Launch announcements work best when you already have an audience. If you have a website, email list, or social media following, tell them about your app:
- Explain what problem it solves, anchored in a specific scenario your audience already recognizes from their daily routine.
- Show screenshots of key features so potential users can picture themselves using the app before they tap install.
- Provide a direct App Store link in every announcement, removing the extra step of searching for the app by name.
- Ask for reviews from early users while their first-week enthusiasm is still high, since fresh ratings carry more weight in the App Store’s discovery signals.
If you don’t have an existing audience, a solid go-to-market strategy can help you build one before launch. Publish content that solves problems related to your app. A meditation app founder might write articles about stress management techniques, building trust with potential users before asking for the download.
Build your iPhone app faster than traditional development
Traditional iPhone development requires learning Swift, Xcode, and iOS frameworks. You write and maintain code, test with simulators and real devices, debug errors, and navigate App Store review. Rejection for issues that take time to diagnose is a real possibility.
AI coding tools can generate impressive results quickly through chat. But if you can’t read or understand the generated code, customization, debugging, and long-term maintenance can become difficult. When AI can’t deliver what you need, you’re stuck learning to code anyway.
Bubble sits between those two paths. Generate native mobile frontend screens in minutes with Bubble AI, then take over in the visual editor for anything you want to refine or fix yourself. You can see exactly how your app works through visual workflows: privacy rules, data structures, and logic, all in plain language you can actually read. When something needs changing, you change it. No prompt loops, no mystery code, no waiting on a developer.
Ready to build your iPhone app without getting stuck in prompt loops or unreadable code? Start building on Bubble for free.
Frequently asked questions about building an iPhone app
Can I build an iPhone app on Windows without a Mac?
Yes. You can design, build, and test your iPhone app on Windows using Bubble in any browser — Bubble handles App Store packaging automatically, so no Mac is required at any stage.
How long does Apple’s App Store review process take?
Most iPhone app reviews complete within 24–72 hours, though first-time submissions or apps with complex privacy requirements may take up to a week.
What’s the total cost to publish an iPhone app in 2026?
The minimum required cost is $99 per year for Apple’s Developer Program. Development costs range from free (visual development platforms like Bubble) to $50,000–$120,000 for a medium-complexity app built with traditional development, with averages across all custom projects running higher.
Do I need Swift programming knowledge to build iPhone apps with AI?
No. Bubble lets you build and publish native iOS apps through visual interfaces, with app logic represented in visual workflows rather than traditional code. Familiarity with iOS design patterns helps, but no programming knowledge is required.
How do over-the-air updates work for published iPhone apps?
Over-the-air (OTA) updates let you push bug fixes and content changes instantly without resubmitting to Apple. Updates deploy when users reopen your app, and changes that require new builds include adding new native functionality or new device permissions.
What happens if Apple rejects my app submission?
Apple provides specific feedback explaining the rejection reason. Common causes include crashes during review, broken features, misleading descriptions, and incomplete privacy disclosures. Fix the flagged issues, upload a new build, and resubmit; most apps get approved within one to three attempts.
Build for as long as you want on the Free plan. Only upgrade when you're ready to launch.
Join Bubble