Generating a custom fitness app with AI is about as simple as clicking a button. But beyond the initial generation, you’ll need the tools, resources, and skills to scale and grow a real business from your app.
How do you get from first prompt to a functional, scalable app?
We’ll show you in this step-by-step guide with real examples.
Clarifying your fitness app idea
It’s tempting to want to take the basics of an idea and jump right into building. After all, AI makes it easy to get quick prototypes in minutes.
But giving in to that temptation is a mistake. Moving too quickly into building will slow you down if you’re not starting with clarity on exactly what your app idea is — and exactly what needs to be built as a result.
For example, is your fitness app primarily for tracking workouts, losing weight, or sharing workouts with friends? Diet and nutrition apps require different core functionality compared to workout apps or activity tracking apps.
If you’re building your app yourself — with code, or with AI or no-code tools — a clear vision is essential. The clearer you are on what you need, the easier it will be to build.
There are three essential things to clarify before you start building:
- What distinguishes your idea from existing fitness apps?
- What are your central features / capabilities, and how will people use them?
- Where will your app be available?
What distinguishes your idea from existing fitness apps?
There are plenty of workout apps out there — what makes yours different?
That’s not a rhetorical question. Knowing your app’s key differentiators — what sets it apart from all the other options users have — not only makes it easier to find and grow your audience, but it also makes it easier to build your app.
Honing in on the key elements that set your app apart allows you to stay focused on what matters most. And this isn’t always app functionality, either. It could be things like:
- Your expertise — Maybe your app has a ton of meal plans or exercise videos from a founder who’s a leading voice in fitness online.
- Your audience — Maybe your app is specifically designed for a certain group overlooked by current solutions. Their unique needs drive the core functionality and new features of your fitness app.
- Solving an existing pain point — Maybe your app will solve a problem current solutions don’t solve, or address a common frustration users have with them. That’s your core functionality to feature.
What are your central features/capabilities, and how will people use them?
Whether you start with a minimum viable product (MVP) or jump right into v1 of your app, you still need to prioritize the key features and functionality your app can’t “live without.”
Once your app is live and gaining some traction and an audience, you’ll be better suited to decide what functionality is most important for future iterations. So, where do you begin? Almost any fitness app will have functionality like:
- The ability to log in and set up a personal profile
- The ability to add / log workouts (via a form, or even access to native device tools like step counters or GPS)
- A dashboard to view previous workouts
- The ability to track different types of workouts or activity
- Syncing with various other devices or apps (i.e. Garmin, Apple Watch, etc.)
But lots of other functionality might be mission-critical for your app, depending on your key differentiators. For example, your app might need:
- A social-style feed to view others’ workouts and like or comment on them
- Milestones and achievements to motivate users to work out
- A library of workouts, training plans, or fitness content
- Ability to add friends or share workouts with others
- A weight-loss tracker
- Nutrition or diet tracking, such as a calendar and forms where users can add meals, count calories, or make menu plans
Another bonus: Making a shortlist of key functionality needed before you start building helps you evaluate tools to build on. That way, you won’t get stuck building on a tool that can’t do what you need.
Where will your fitness app be available?
Are you building a fitness app for web or mobile? If it’s a mobile fitness app, are you building it for iOS or Android? Or do you want to be available on more than one platform, or everywhere?
These choices fundamentally dictate how you’ll build your app. Obviously, if you’re going the traditional development route, you need to hire a team that can build in the appropriate programming languages for web or mobile.
If you’re building yourself with AI or no-code, though, this is still an important consideration. Not every no-code and AI tool can build cross-platform mobile apps, and many of the ones that can don’t build native mobile apps.
Instead, they build a web app and “wrap” it in a mobile-specific container. This usually means you won’t have access to full mobile functionality and design, leading to a worse mobile experience for users.
How to make a fitness app: Step-by-step walk-through
With your idea in place and features solidified, it’s time to actually build your app.
We’ll walk you through the basics of fitness app development using Bubble — one of the easiest and most versatile ways to build — but you can follow these same general principles no matter what tools you use.
Rather watch a real-time walk-through? We’ve got you covered here:
Step 1: Prompt Bubble AI
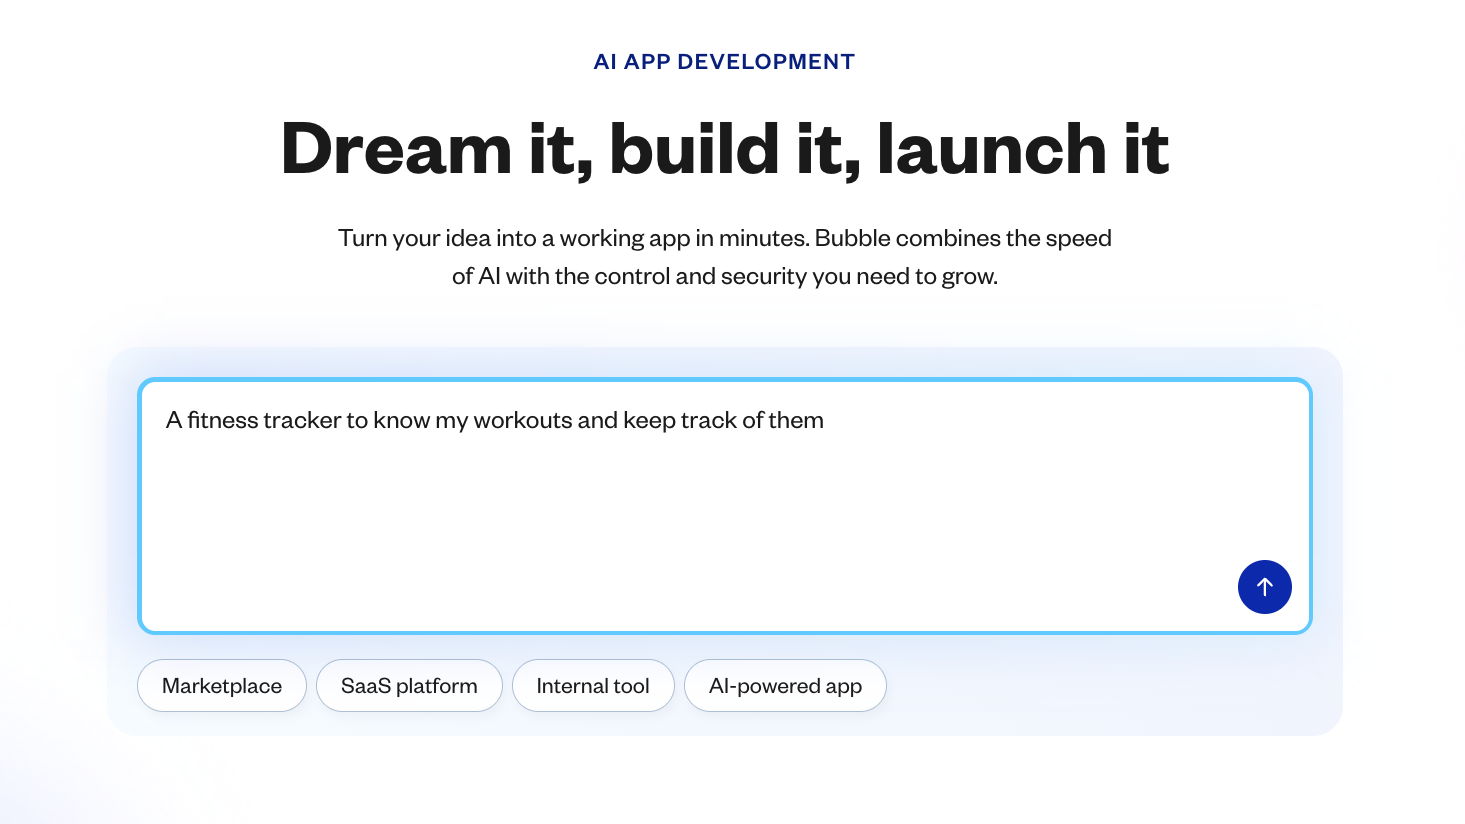
If you’re starting with a web app, you can massively speed up — and simplify — the process of creating your fitness app by starting with Bubble’s AI. Assuming you’ve done the work in the questions above, this part is easy: Write a prompt with your idea, and include key differentiators and your short list of key features.
Even if you don’t know the answers to all those questions yet, Bubble’s AI can still get you started. A simple prompt with a few key features or jobs to be done is enough to kick things off.
From there, you’ll see the key features of your app set to be built.
Much like in the traditional development process, this is the time to make adjustments if anything seems off (use the chatbox in the left-hand sidebar to do so). Are any key features missing?
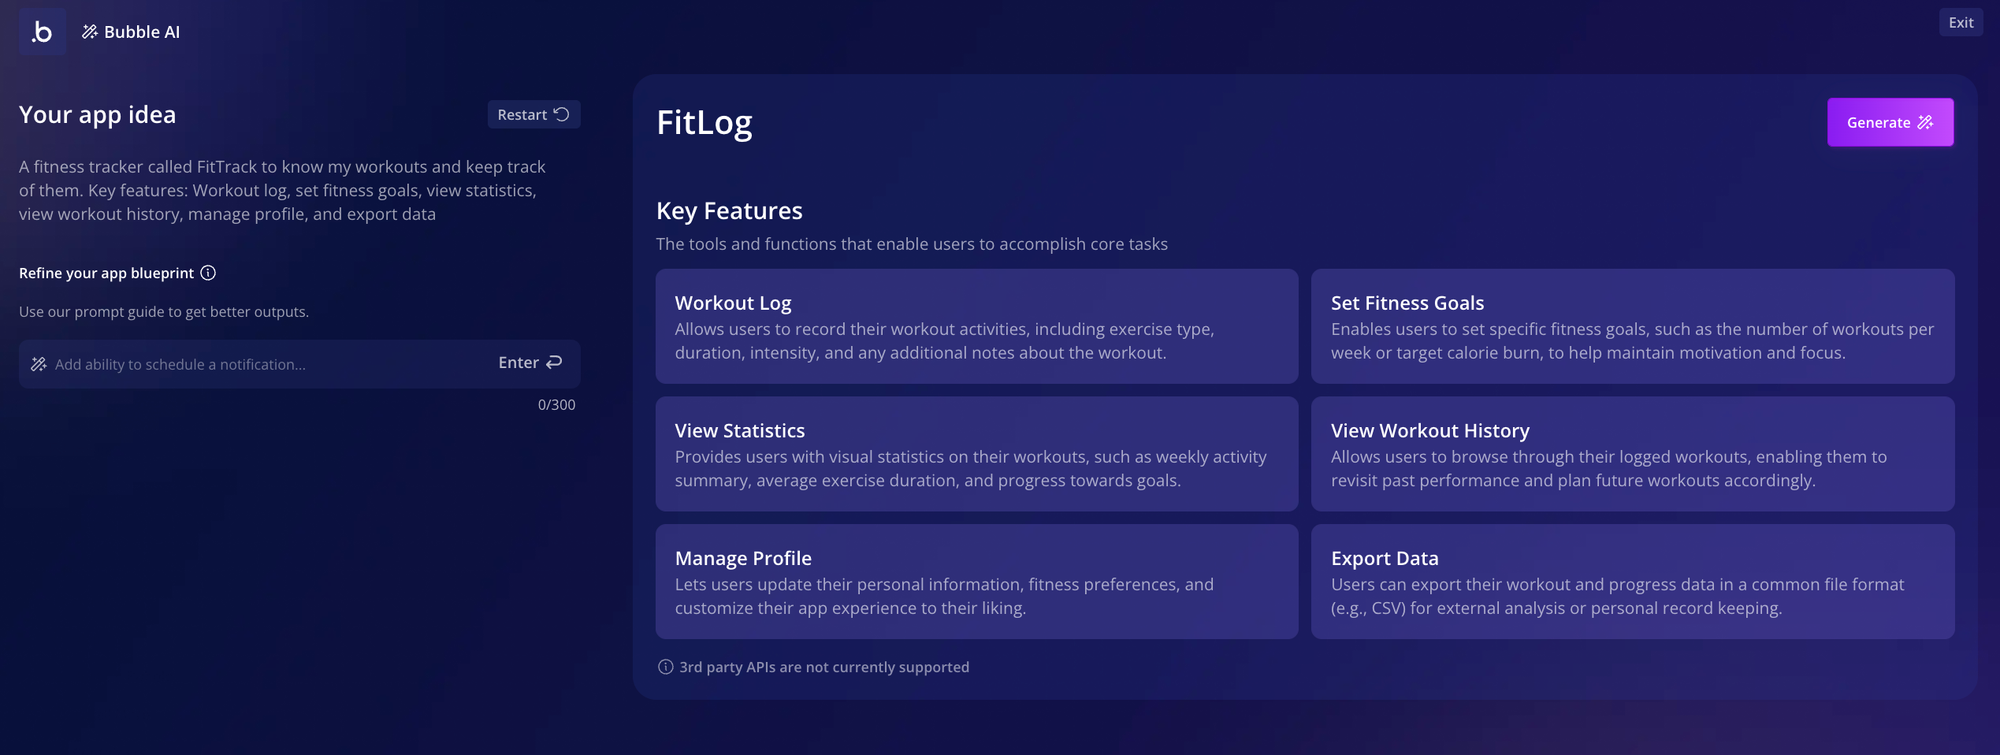
Remember: You don’t need to eat the entire elephant in one go. Start with the most important features, and leave nice-to-haves for later. It’s easier and more effective to dial in the core functionality first, then iterate and build out more complexity after.
When everything looks good, just click Generate.
Step 2: Preview your fitness app
Bubble AI takes about 5–7 minutes to generate your app. When it’s finished, it’ll bring you directly to your app preview in the Bubble editor.
Bubble AI generates all the basics for your app: design (the user interface), data (backend databases to hold user information, like workout data), and logic (workflows that power the functionality of your app).

Of course, no two app generations are the same. Your app will look different — even if you use the same prompt — and as the Bubble AI improves, the design, features, and functionality it will create will shift.
If you don’t love the first output, you can adjust your prompt and add more details to re-generate another app and get to a better foundation.
But keep in mind this is just a starting place. As with any AI tool, the details may not be exactly what you had in mind. On Bubble — unlike with other AI tools — you have full control to change any aspect of your app to bring it in line with your idea.
Once you’re in the preview, take a complete walk-through of your app, looking at each page and noting the following:
- Are any pages missing or unnecessary?
- Does each page have the appropriate features and data displayed? (i.e., does the “Dashboard” page show the workout history and stats you want it to?)
- Are any features or functionality missing?
- Does the UI look the way you want it to? What do you want to change or adjust?
- Do all buttons, forms, input fields, and other UI actually work? If not, what functionality is missing?
Test your app’s functionality and features as well as the design, then make a short list of any changes or additions that need to be made.
Step 3: Get data and logic working
Now, it’s time to get your hands dirty. Back in the Bubble editor, you can edit the data (information your app stores and uses) and logic (workflows that power functionality) in an intuitive, visual way — no coding needed. This way, you have full control to make all the changes you outlined in Step 2.
Data types are stored in your app’s database. Basically, any information your app stores — from users to workout details to goals and more — are going to be stored in a database in the backend of your app.
Bubble’s AI will generate some basic data types for you, based on your app’s features. For our example, it generated users, goals, workouts, and workout types.

But you’ll probably need to add some more data types to make your app really shine. For example, in our fitness app, we noticed that clicking the “Workout Type” button in the UI didn’t give us any workout type options, even though the dropdown is set up correctly. This means we have incomplete data!

Fixing something like this — or adding more data to your app — is easy. The simplest way is to add Data Types with AI. From the data tab in the editor, click Generate Data Types by the Bubble AI button. Then describe the feature you’re building and the AI will generate fitting data types and fields.

Once your data type has been created — in this case, “Workout Type” — you can go to the app data tab to add sample data for it.
These will create options for the dropdown menu. Click New entry, then add the dropdown option to the Name field and click Create.

Repeat this process for all the entries you want to add, and you’ll start seeing them show up in your database.

When we go back to our app, we’ll see these choices reflected in the dropdown menu. Voila! It’s that easy to pull data from the backend of your app to be displayed to the user.

Logic involves the backend workflows that power the functionality of your app. Typically, on Bubble, it’s built with if/then statements. For example:
- If the “Log workout” button is clicked, then add a new workout to the database.
- If the “Create goal” button is clicked, open the popup with the new goal form.
- If the user logs in, take them to their dashboard.
Bubble’s AI generated 16 workflows for us right away, mostly related to buttons. Almost everything “just worked” from the start, which is a huge lift. But what if you want to add some additional functionality?
Thankfully, that’s pretty easy, too.
For example, we noticed there wasn’t an option to delete a goal from our goals list. Let’s add one using a simple trash icon as a “delete” button.
First, drag and drop a new icon into the section of the element where you’d like it to display. Make sure to edit the button’s internal name (click on the name at the top of the property editor). You can also use the Property Editor to adjust how the icon looks.

With the button created, you can now add the logic that will make it work. Click Add workflow in the property editor.
This will bring you to Bubble’s workflow editor. This is where we tell the app what to do when that button is clicked. The “trigger” is already set up (when the button is clicked). Just click to add a step, then select Data (Things) > Delete a thing > Parent group’s goal.
This tells your app: If [this icon is clicked], then [delete the goal they’ve clicked on from the database].

When you go back to your goals list in preview mode, you can test it out and see it in action.
That’s really all it takes — you can add new elements, data, and workflows to your Bubble app following these same basic steps and principles.
- Read up on logic and workflows in the Bubble manual.
- Dive into the Bubble Basics for AI Builders course with Gregory John.
- Use Bubble plugins or the API connector to easily add advanced functionality — like AI, payments, or push notifications — to your app, or connect your app to other software.
- Get stuck while building? Ask the Bubble AI bot (in the lower right-hand corner of your Bubble editor) or head over to the Forum to pose your question to our active community.
Step 4: Refine your app UI
When you’ve adjusted the functionality and features of your app, it’s time to refine the user interface (UI) of your app.
Bubble uses a visual editor for design and UI, too. But unlike many vibe coding tools, you get full customization and control for pixel-perfect design.
You’ve already seen how easy it is to add or edit UI elements (as with the “Delete” button in the previous section). But the overall look and feel of your app can be iterated on pretty quickly, too.
You can make quick changes directly from the design tab by clicking on any element to edit it directly.
For example, click on the header of your page to change the text, font, size, letter spacing, and more.

Next, let’s add some images to make the homepage of our app a bit more visually appealing. To do so, start by dragging and dropping a group from the sidebar onto your app page. Then, drag and drop three image blocks from the sidebar into that group.
Under the Appearance tab, click to upload your images.
Next, we want these images to show up in a row, so go to Layout and change the Parent container type to Row. From here, you can also adjust the alignment (want them to be centered? left-aligned?), spacing, and more.

Any other design changes can be done in the same way. Click on the element you want to edit — or drag and drop it onto your canvas — and use the popup to fine-tune the visual feel and functionality of that element.
For large-scale design changes, use the Styles tab. This is where you can set up big-picture design systems for your app, like default fonts and colors. For example, we used styles to change our app to dark mode by setting default backgrounds to a dark color scheme, while adjusting default fonts, button colors, and outlines to lighter colors.

With just a few clicks, your app’s look and feel is changing completely. Best of all: You’re in control of every little detail. No endless prompting AI back-and-forth only to not get the exact changes you want, or not being able to adjust individual elements.
Click, drag, drop, edit. You’re in control the whole time — and you don’t need to learn a whole new programming language to do so.

Step 5: Test, iterate, and launch
Your app looks, feels, and works how you want it to — now it’s time to get your app ready to launch. Here’s what to do next:
Test it out. Testing is essential to make sure your app functions as you want it to. There are a few ways to test directly from the Bubble editor:
- Use preview mode. This allows you to see, use, and click through your app as a user would. It’s a great way for testing buttons, workflows, and functionality, as well as design and UI.
- Use the debugger. From preview mode, the debugger helps you analyze workflows and logic — helpful for troubleshooting when you encounter unexpected behavior. You’ll see actions outlined step-by-step to help you identify broken links or missing pieces in workflows.
- Look at the issue checker. In the upper right tool bar on the Bubble editor, you’ll see the issue checker. It automatically scans your app for inconsistencies or errors, giving you a quick checklist to resolve before you launch.
- If you’re building for mobile, use Bubble Go. The Bubble Go app lets you preview and use your mobile app on real mobile devices, before you launch. This is a great way to run internal or user testing and see how real users will use your app.
Iterate. When you find errors or places to improve within your app, Bubble’s AI bot in the editor can help you troubleshoot and fix any issues. You don’t have to dig through lines of code or your app’s databases to try to find the issue and pinpoint a solution — just ask the Bubble bot.
Describe the problem and what you’d like to do, and the help bot will provide step-by-step directions on how to get things working. Soon, Bubble’s AI bot will be able to read and analyze your app directly — giving you even more detailed answers and troubleshooting specific to your app.
Launch. Remember, your app doesn’t need to be perfect to launch. Sharing your app with a real audience will give you more valuable feedback than you could ever find on your own, and will help you understand how to iterate further to best serve your users.
On Bubble, launching is easy — just click Deploy and Bubble takes care of pushing your app live. You can also launch mobile apps directly to the Apple App Store and Google Play Store from the Bubble editor, too. The app store processes for approval and deployment are a bit more complex, but Bubble will help you package and submit your app for approval.
When you launch, you might also start considering a monetization strategy for your app. Gamification elements, in-app ads, sponsored content, or other paid health and fitness content could all be potential options for monetizing your app post-launch.
Resources for building your fitness app
As you build, you’ll find tons of ways to go deeper into the Bubble editor to add more complexity and make your fitness app exactly how you imagine it. Whether you’re a true beginner or an experienced programmer, we have tons of resources to help you build faster:
- Watch our entire Bubble Basics for AI Builders, or dive into our YouTube channel to find video tutorials for anything on Bubble.
- Curious about building for web and mobile? Learn how to convert your web app to a mobile app, or get our guide on cross-platform development.
- Learn the basics of native mobile development with our deep-dive video course.
- Need answers on a particular element of the Bubble editor? Find answers for everything in the Bubble Manual.
- Want support as you build? Ask for help from thousands of experienced devs and Bubble builders in the Bubble forums, or hire a Bubble agency to help you build your app.
Build your own fitness app on Bubble AI
If you’re looking to build your own fitness app without coding, but without giving up full control or customization, Bubble is your best choice.
Bubble’s AI builder, visual editor, and all-in-one editor for both web and native mobile apps gives you the most versatility and control for building apps exactly as you imagine them. Generate a custom fitness app in minutes with AI, edit and iterate without code, and get support from AI or other builders at every step of the way.
Best of all? Bubble is free to build on until you’re ready to launch. Get started for free today and bring your own fitness app to life →
Build for as long as you want on the Free plan. Only upgrade when you're ready to launch.
Join Bubble