TL;DR: You can build fully functional AI agents without coding using Bubble's visual platform, which combines AI-assisted generation with hands-on editing to create autonomous systems that make decisions and perform complex tasks. The guide covers the fundamentals of AI agents and provides an 8-step process to design, build, test, and deploy your own agent — from planning and interface design to connecting AI models and launching in production.
AI agents handle complex tasks, make decisions on the fly, and operate autonomously — reshaping how work gets done. But building an AI-powered system from scratch can feel daunting, especially without a technical background.
That’s where Bubble comes in. Whether your AI agent needs to handle support tickets, qualify leads, coordinate scheduling, or something else entirely, Bubble’s no-code AI agent builder gives you the tools to do it yourself.
We'll start with the basics of AI agents and how they differ from simpler tools like chatbots, then walk you through building your own on Bubble.
Understanding AI agents
An AI agent is an autonomous system that makes decisions and takes action to achieve specific goals. Unlike traditional apps that follow predefined instructions, AI agents analyze new situations and respond adaptively. This makes them especially useful for handling complex and unpredictable work.
For example, consider keeping CRM records up to date. A traditional software solution would need explicit rules for every type of input and output it might process.
An AI agent could review emails and Slack threads, identify when a deal has moved to a new stage, extract the relevant details, update the CRM, and notify the right team.
AI agents use large language models (LLMs) to interpret natural language and reason through goals. They might send an email, query a database, summarize a document, or trigger a set of actions based on what the user asked for.
Some agents operate behind the scenes, while others interact directly with users through chat interfaces or embedded components in an app. Some are designed for narrow, specialized tasks, and others are more flexible, chaining actions together and calling tools.
What makes AI agents different from chatbots and virtual assistants
AI agents are often confused with chatbots or virtual assistants, but they're fundamentally different. While all three use AI to interact with users, their core capabilities vary significantly.
- Chatbots: follow predefined scripts and decision trees to answer common questions or handle simple tasks. They're reactive.
- Virtual assistants: use natural language processing to understand and respond to a wider range of commands. However, they're still reactive, waiting for user prompts.
- AI agents: proactive and autonomous. They make decisions, plan multi-step actions, and work toward goals.
Think of it this way: a chatbot can tell you the status of your order. A virtual assistant can place a new order for you. An AI agent can monitor your inventory, predict when you'll run out of an item, and automatically place a new order on your behalf.
Common AI agent use cases and examples
AI agents can be applied to almost any business process that involves decision-making and a series of actions.
Here are a few common use cases:
- Automated Customer Support: An agent can analyze incoming support tickets, categorize them by urgency and topic, retrieve relevant information from a knowledge base, and provide an initial response or route the ticket to the correct human agent.
- Intelligent Lead Qualification: Instead of a simple form, an AI agent can engage with potential customers on your website, ask qualifying questions in a conversational way, and update your CRM with the lead's information and qualification score.
- Proactive Data Monitoring: An agent can monitor data streams from various sources (like sales data, website analytics, or social media mentions), identify significant trends or anomalies, and automatically generate a summary report or send an alert to the relevant team.
- Personalized Scheduling: An agent can manage your calendar by interacting with others via email to find a suitable meeting time, considering your preferences, priorities, and existing schedule, and then send out the calendar invite.
How to build an AI agent in 8 steps
The exact process of building an AI agent will vary depending on the platform you use. While the principles we’ll cover are broadly applicable, the specific steps we share will walk you through building an AI agent on Bubble.
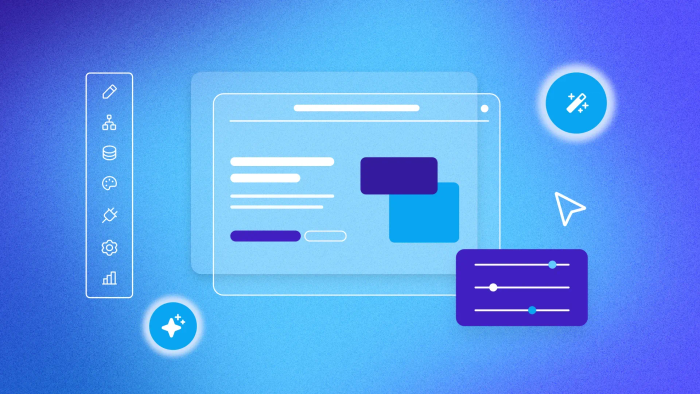
Bubble is the only truly no-code AI app builder that lets you vibe code without the code to build powerful apps of any kind, including AI agents. Chat with AI when you want speed, edit directly when you want control — and switch seamlessly between them. Bubble AI jumpstarts your development by automatically generating a blueprint and user interface, and the Bubble AI Agent continues to assist you throughout — adding features, troubleshooting, and learning as you build.
Here’s how to build an AI agent on Bubble, step by step.
Step 1: Plan what you want your AI agent to do
Before you start building, outline exactly what your AI agent should do and how it should behave. What goal is it working toward? What kinds of tasks will it perform autonomously? Will it respond to user input? Act on backend data? Proactively monitor for specific events?
You can plan all of this manually, or use Bubble AI to generate a blueprint for you. Simply describe what you want your AI agent to do in natural language. The more specific your prompt, the better the results.
For example, “I want to build an AI agent that monitors incoming support emails, summarizes each one, creates a support ticket in our database, and routes it to the correct department based on the message content.”
Bubble AI will turn this into a structured blueprint that includes\a breakdown of features the agent will need to support those tasks
Continue prompting Bubble AI to add, remove, or refine features until the blueprint matches exactly what you want your AI agent to do.
Step 2: Choose the right AI agent platform
The platform you choose determines how quickly you can build, how much control you have, and whether you can scale as your needs grow. There are three main approaches:
- Traditional coding: Maximum flexibility but requires handling infrastructure, security, maintenance, and significant development expertise.
- AI coding tools: Incredible for getting started quickly, but often leave you with code you can't read. When you need to fix something specific or customize a feature, you're stuck prompting and hoping the AI understands—or hiring a developer to rescue you.
- Bubble: Combines AI generation speed with complete visual control. See exactly how your app works — no code you can't read, no hoping the AI got it right.
Step 3: Design your AI agent’s interface
Although many AI agents operate primarily behind the scenes, they still need some kind of user interface. This could be as simple as a button to trigger actions or a status page that shows what the agent has done. But if your agent involves more user interaction, you may want a more fully developed, app-like interface.
Either way, Bubble gives you three options for creating your AI agent’s interface:
- Generate it with Bubble AI. If you created an AI-powered blueprint in the previous step, Bubble AI can turn it into a complete interface based on your defined features.
- Design it yourself. Use Bubble's no-code, visual editor for full control over layout and components.
- Start from a template. Customize a prebuilt template from Bubble's marketplace to fit your use case.
If you use AI to generate the interface, you can preview and customize it in Bubble's editor —you're never locked into what the AI produces.
Step 4: Connect to AI models and other tools
Your AI agent needs access to the various systems it will interact with. This starts with the AI model that powers your agent's intelligence. Bubble offers built-in AI integrations with leading large language models like OpenAI or Anthropic, and makes it easy to connect others via plugins or the API connector.
You can even connect to multiple models to take advantage of different strengths. For example, you might use one model for summarization and another for planning actions.
In addition to your AI model(s), you’ll want to set up integrations with other tools or services. Depending on your agent's purpose, these might include a CRM, messaging or email platforms, and external APIs.
Step 5: Set up your AI agent’s memory with Bubble’s database
AI agents need memory to support capabilities like:
- Multi-step conversations with context that builds across prior answers
- Task handoff between agents or users without losing information
- Dynamic personalization based on each user’s past behavior and preferences
On Bubble, this is handled through the built-in database, which gives your agent structured, persistent memory — no SQL required. You can define custom data types, apply privacy rules to control access, and use search tools to quickly retrieve the right data.
And if your agent needs more advanced memory capabilities, like semantic search across past documents or chat history, you can integrate external tools like vector databases that are optimized for that kind of functionality.
Step 6: Build workflows to power your agent’s logic
Workflows on Bubble define functionality by specifying which actions run in response to a triggering event. You can generate workflows with the AI Agent or build them visually. That might be a user clicking a button, a condition being met, or a scheduled event firing.
For AI agents, workflows orchestrate every step, from receiving input to processing it, storing memory, and triggering actions. Whether that means replying to a message or updating a CRM, it’s all directed through visual workflows.
Your workflows will coordinate how and when your agent:
- Interprets user input (or incoming data)
- Chooses a course of action based on the current context
- Calls AI models, APIs, or internal tools
- Updates the database
- Notifies users, sends emails, or kicks off other workflows
Most agents will need a combination of custom workflows and AI decision-making. For example, you might create a Bubble workflow that listens for a user request, sends it to an AI model for interpretation, then runs different follow-up actions depending on the model’s response. You can also chain workflows together or set up scheduled workflows to let your agent operate independently.
Because you can see exactly how your workflows function, you can make precise changes when needed—even when AI hits its limits.
Step 7: Test and refine your agent’s behavior
Once your agent has all the core components in place — interface, integrations, memory, and workflows — test how it handles different scenarios, evaluate its decision making, and refine its logic.
Watch for things like:
- How well your agent interprets prompts or user input
- Whether it takes the correct actions across different scenarios
- How memory and context affect behavior over time
- How it handles edge cases
Begin with simple, straightforward tests. Once it passes those, simulate more complex scenarios with unexpected inputs, additional steps, or handoffs between workflows. Refine your prompts and workflows until your AI agent performs consistently.
Step 8: Deploy and iterate
When your AI agent is working reliably, you’re ready to go live. Bubble lets you deploy with just a few clicks.
But deployment is just the beginning. Keep iterating as you gather feedback, track performance, and observe how your agent handles different users and scenarios.
Bubble provides built-in bug tracking and error reporting, version control for testing changes safely, and seamless scaling as your user base grows.
Start building your AI agent today
You don’t need a background in machine learning or app development to create something powerful with AI. Bubble gives you the tools to build, test, and launch your own AI agent, with no coding required.
Whether you’re creating a standalone agent, embedding one into a larger app, or coordinating multiple agents to work together, Bubble helps you bring your vision to life. Start building with a free account →
Frequently asked questions about building AI agents
Are AI agents difficult to build?
No. Bubble's visual platform makes building AI agents accessible without traditional coding. The platform provides both AI-assisted generation and hands-on editing, giving you flexibility and transparency throughout development.
How long does it take to build an AI agent?
Simple agents take hours or days on platforms like Bubble, while complex multi-system agents may take several weeks. This is significantly faster than traditional development, which can take months.
What's the difference between AI agents and chatbots?
The main difference is autonomy. Chatbots are reactive and follow scripts to answer questions. AI agents are proactive; they can make decisions, perform multi-step tasks, and work towards a goal without needing a specific command for every action.
Do I need coding experience to build an AI agent?
No. Bubble's visual platform lets you build functional AI agents without coding experience. The platform provides visual tools for designing interfaces, setting up databases, and building agent logic.
How much does it cost to build an AI agent?
Using Bubble dramatically reduces costs compared to hiring developers, and you can build faster than with traditional no-code platforms. On Bubble, you can build and test for free. Paid plans that support launching a real application start at an affordable monthly rate. The other main cost is for API calls to the AI model (like OpenAI or Anthropic), which is typically based on token usage — you pay per million tokens processed, with different rates for input and output tokens.
Build for as long as you want on the Free plan. Only upgrade when you're ready to launch.
Join Bubble